How to change the port for vault connections
You may want to change the port for communication between the Private Cloud Vault and the Cibecs agents.
Changing a vault's port is a 2 step process. The below article will go through the steps to change the vault port in the vault configuration file and the front-end.
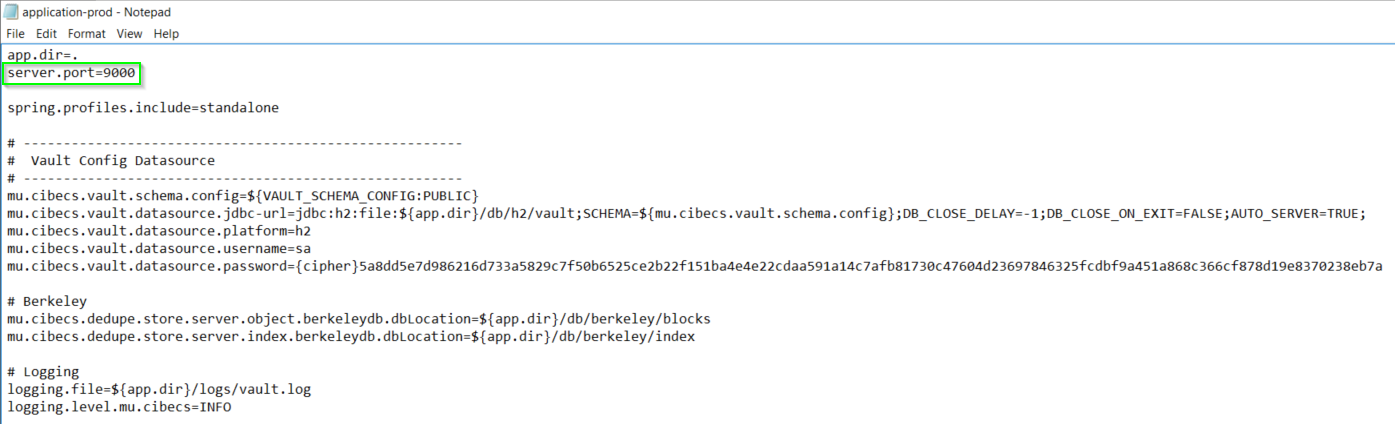
Configuration File Changes
- Navigate to the installation directory of the Vault (Default is C:\Program Files\Cibecs\Vault)
- In the \config directory open the application-prod.properties file in a text editor
- Edit the server.port field with the required port number (Default is 9000) and save the file
- You may be prompted to save the file in a different location, this can be bypassed by opening the text editor with administrative privileges
- For the change to take effect the Cibecs Private Cloud Vault service needs to be restarted
Frontend Changes
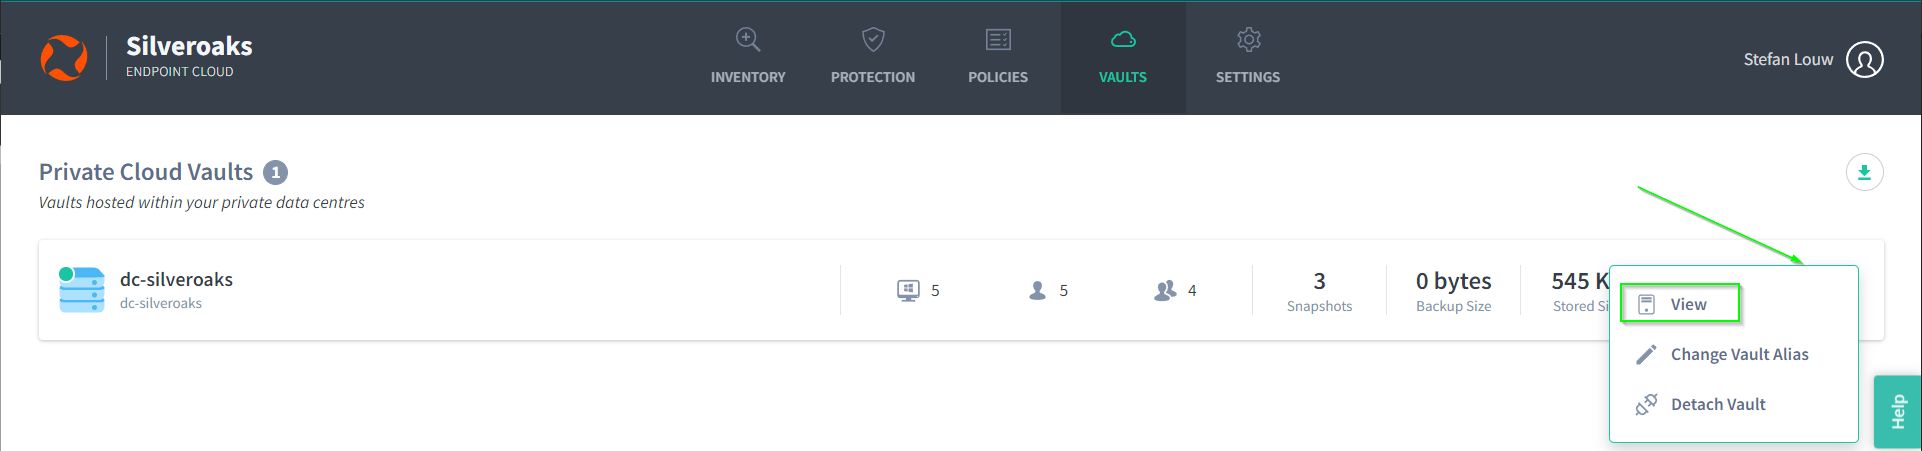
- Logon to your Endpoint Cloud tenant and navigate to the Vaults page
- On the vault that you would like to change the port, click on the ellipses and select View
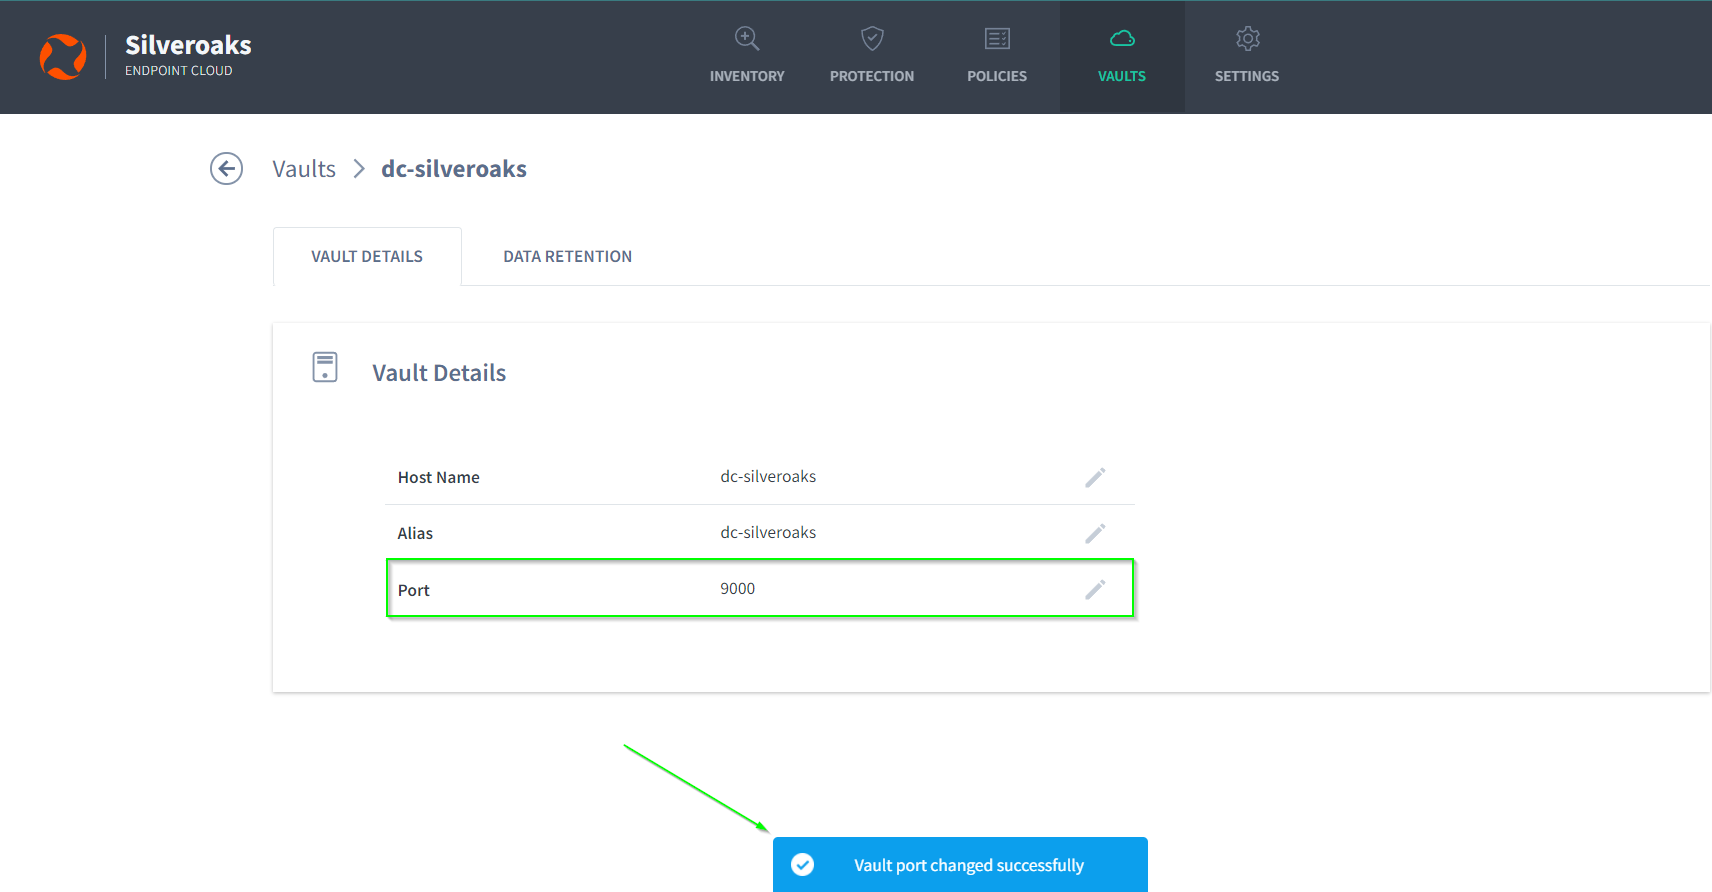
- Change the Port field to the desired port that you would like to use, noting that it must be that same port number that was added in the application-prod.properties file
- You will receive a notification to confirm that the change was successful
Tests
- Confirm that backups are completing successfully after the change
- Confirm that restores are completing successfully after the change
Troubleshooting
- Ensure that there are no firewalls blocking your selected port
- Third-party internal firewall or proxy
- Windows built-in firewall on both the vault host and the endpoint
- Log a support call with the following files included
- The application-prod.properties file
- The protection agent log file from the day before the change was made to a few days after the change was made (%appdata%\Cibecs\Agent\Logs\agent.log)
- The Vault log file from the day before the change was made to a few days after the change was made (Default is C:\Program Files\Cibecs\Vault\Logs\vault.log)