Step 13 - Migration in Action
At some point, you will most likely need to replace one of your protected devices. For example, an old device may need to be upgraded to a newer model or a protected device may be lost or stolen. To make it easier and quicker to set up a new device, Endpoint Cloud has a migration feature.
With the migration feature, you can set Endpoint Cloud to make monthly backups of the Windows user profile settings on protected devices. Then, when you need to replace a protected device, you can migrate its settings from Endpoint Cloud to the new replacement device.
To use the migration feature, you need to enable it on the relevant policies.
Enable User Profile Migration
To enable the user profile settings migration feature:
- In Endpoint Cloud, click Policies.
- Edit the Policy that is associated with device's team.
- Click Migration.
- Enable the profile migration for Microsoft Windows User Profiles.
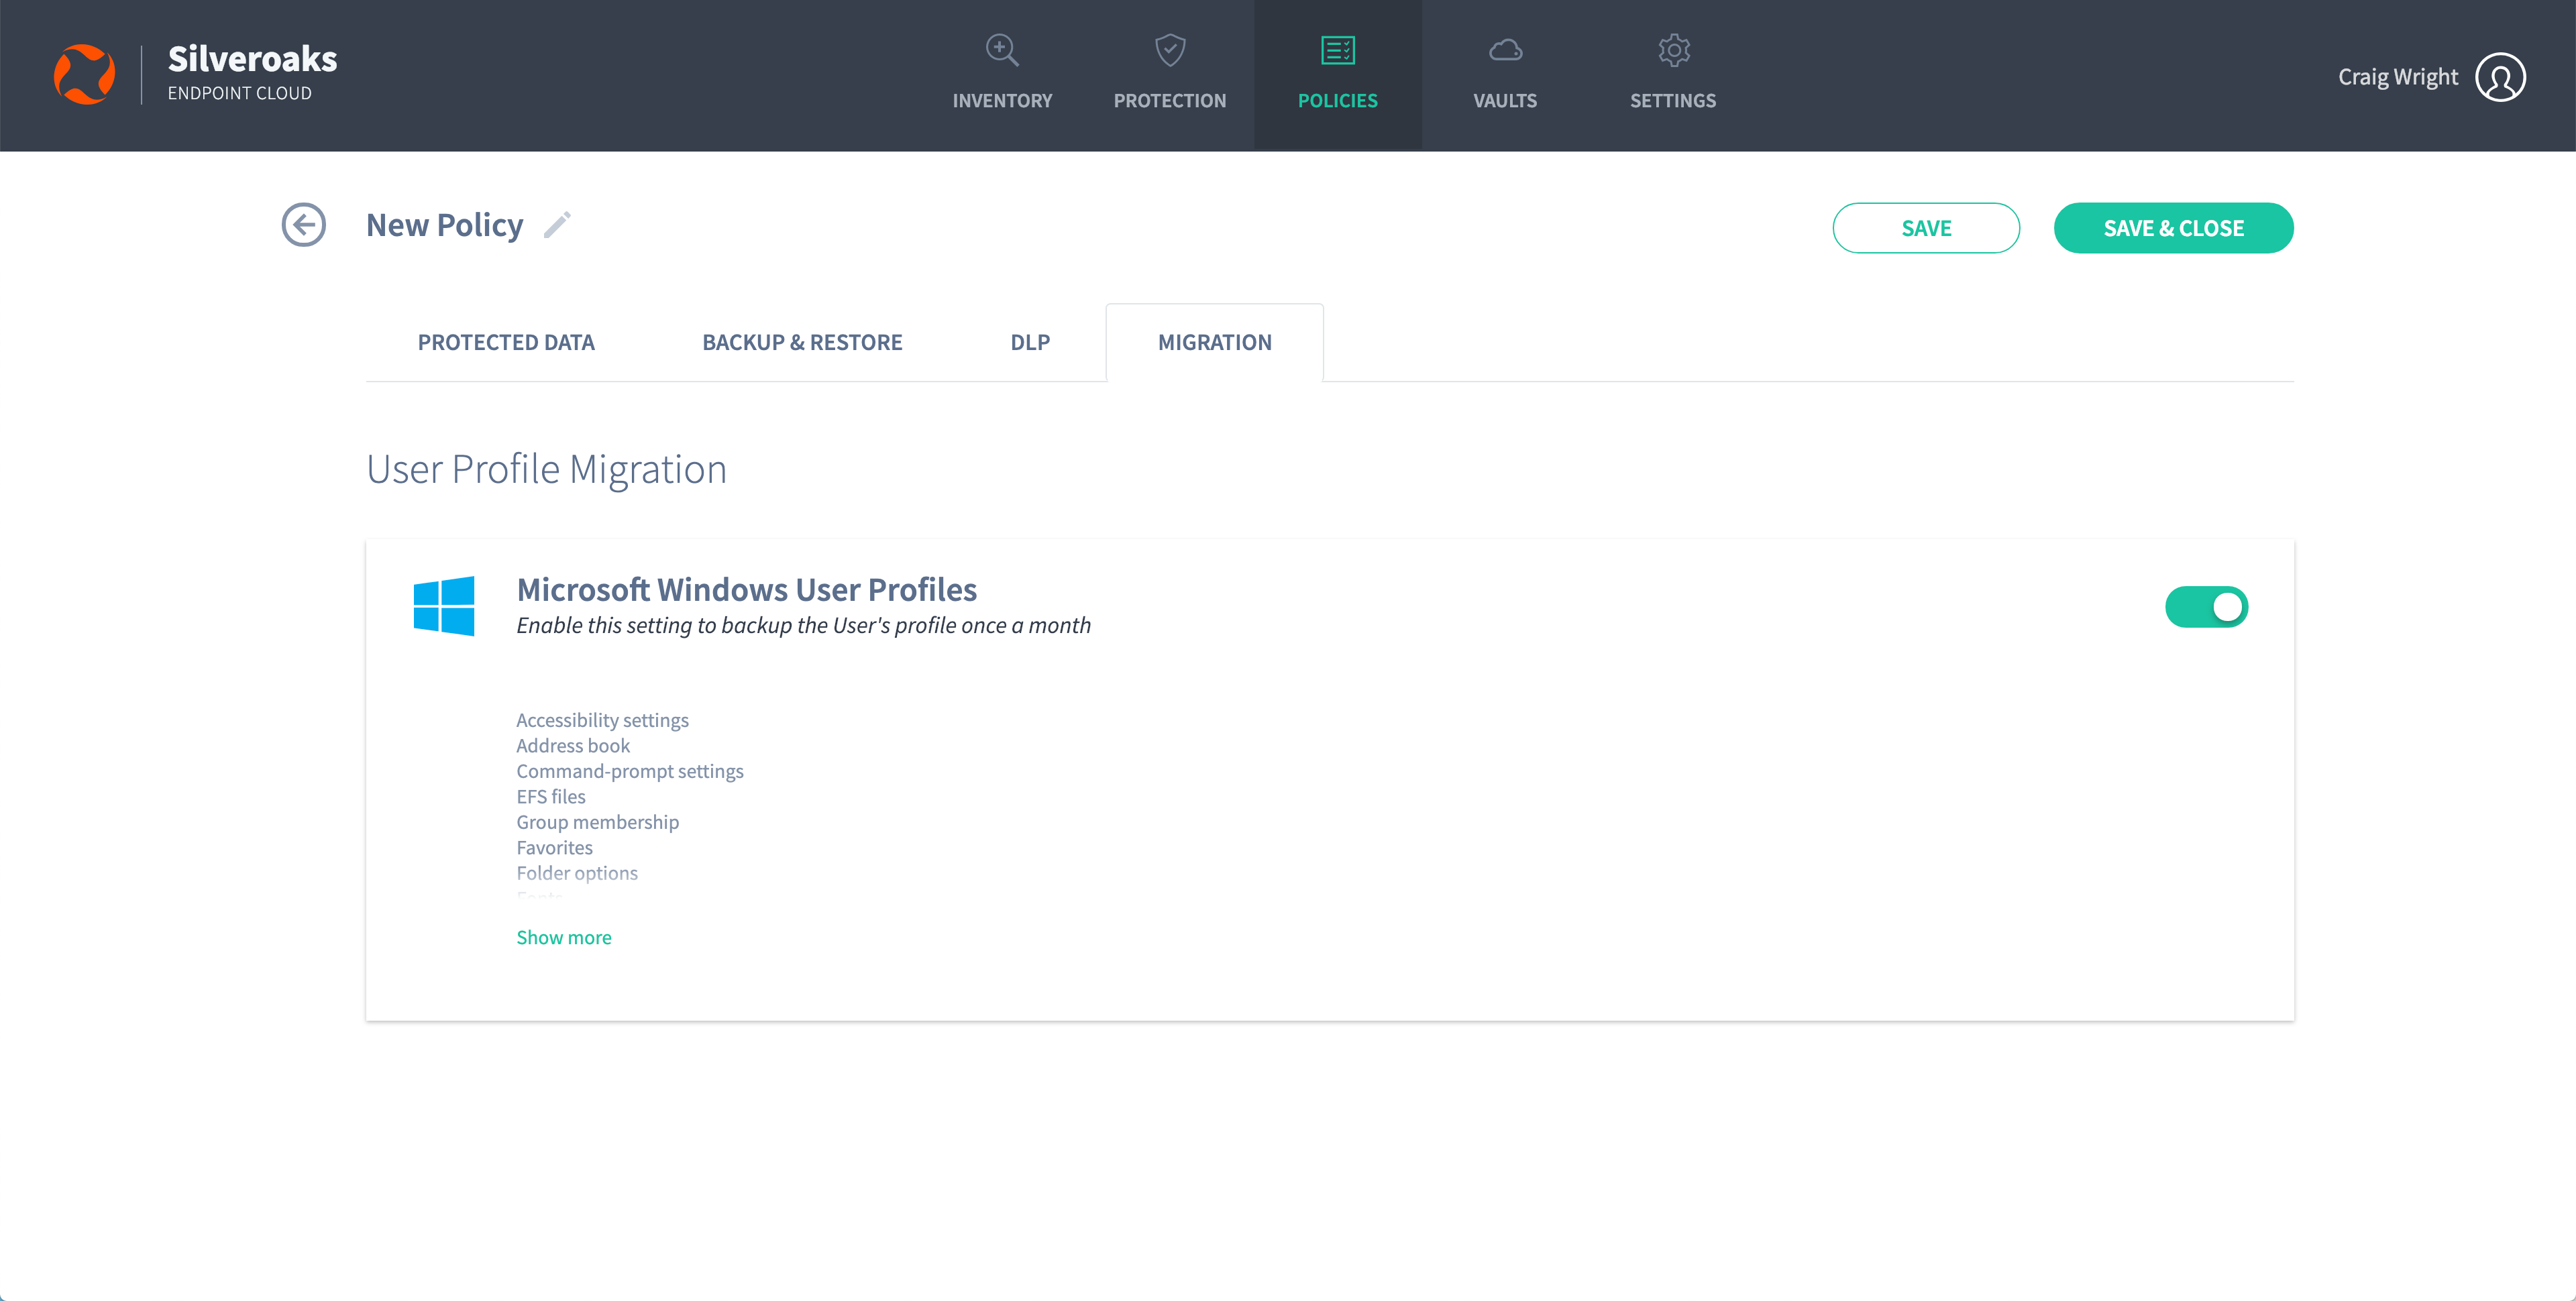
- Click the Show more link to see a full list of the Windows user profile information that will be backed up. It includes taskbar layout, mapped network drives, folder options, email accounts, previously attached pst files, and email signatures.
- Click Save and Close.
The user data and profiles on the protected devices will be backed up when the next business data backup takes place (as scheduled in the policy).
When a backup has been made, you can migrate the settings to a new device.
Migrate settings to a new device
If you have enabled Migration on a Policy, you can use Restore to transfer the Windows User Profile data (and backup data) from an old device to a new device (via Endpoint Cloud).
To Restore files to a device:
- Log on to the new device.
If the device already has the Discovery Agent installed, ignore steps 2 and 3 and continue from step 4.
If you need to restore data to a new device or a device that has not been protected by Endpoint Cloud before, you need to install the Discovery Agent. Continue from step 2.
- Install the Discovery Agent on the device, so that Endpoint Cloud can detect it.
If you need more information, see Install the Discovery Agent.
- In Endpoint Cloud, activate the new device.
If you need more information, see Activate your Devices.
NoteEndpoint Cloud uses the Windows user account on the new device to identify which old device is being replaced. It assigns the new device to the same team and user profile as the old device automatically.
- In the Windows system tray, right-click on the Protection Agent icon and select Restore.

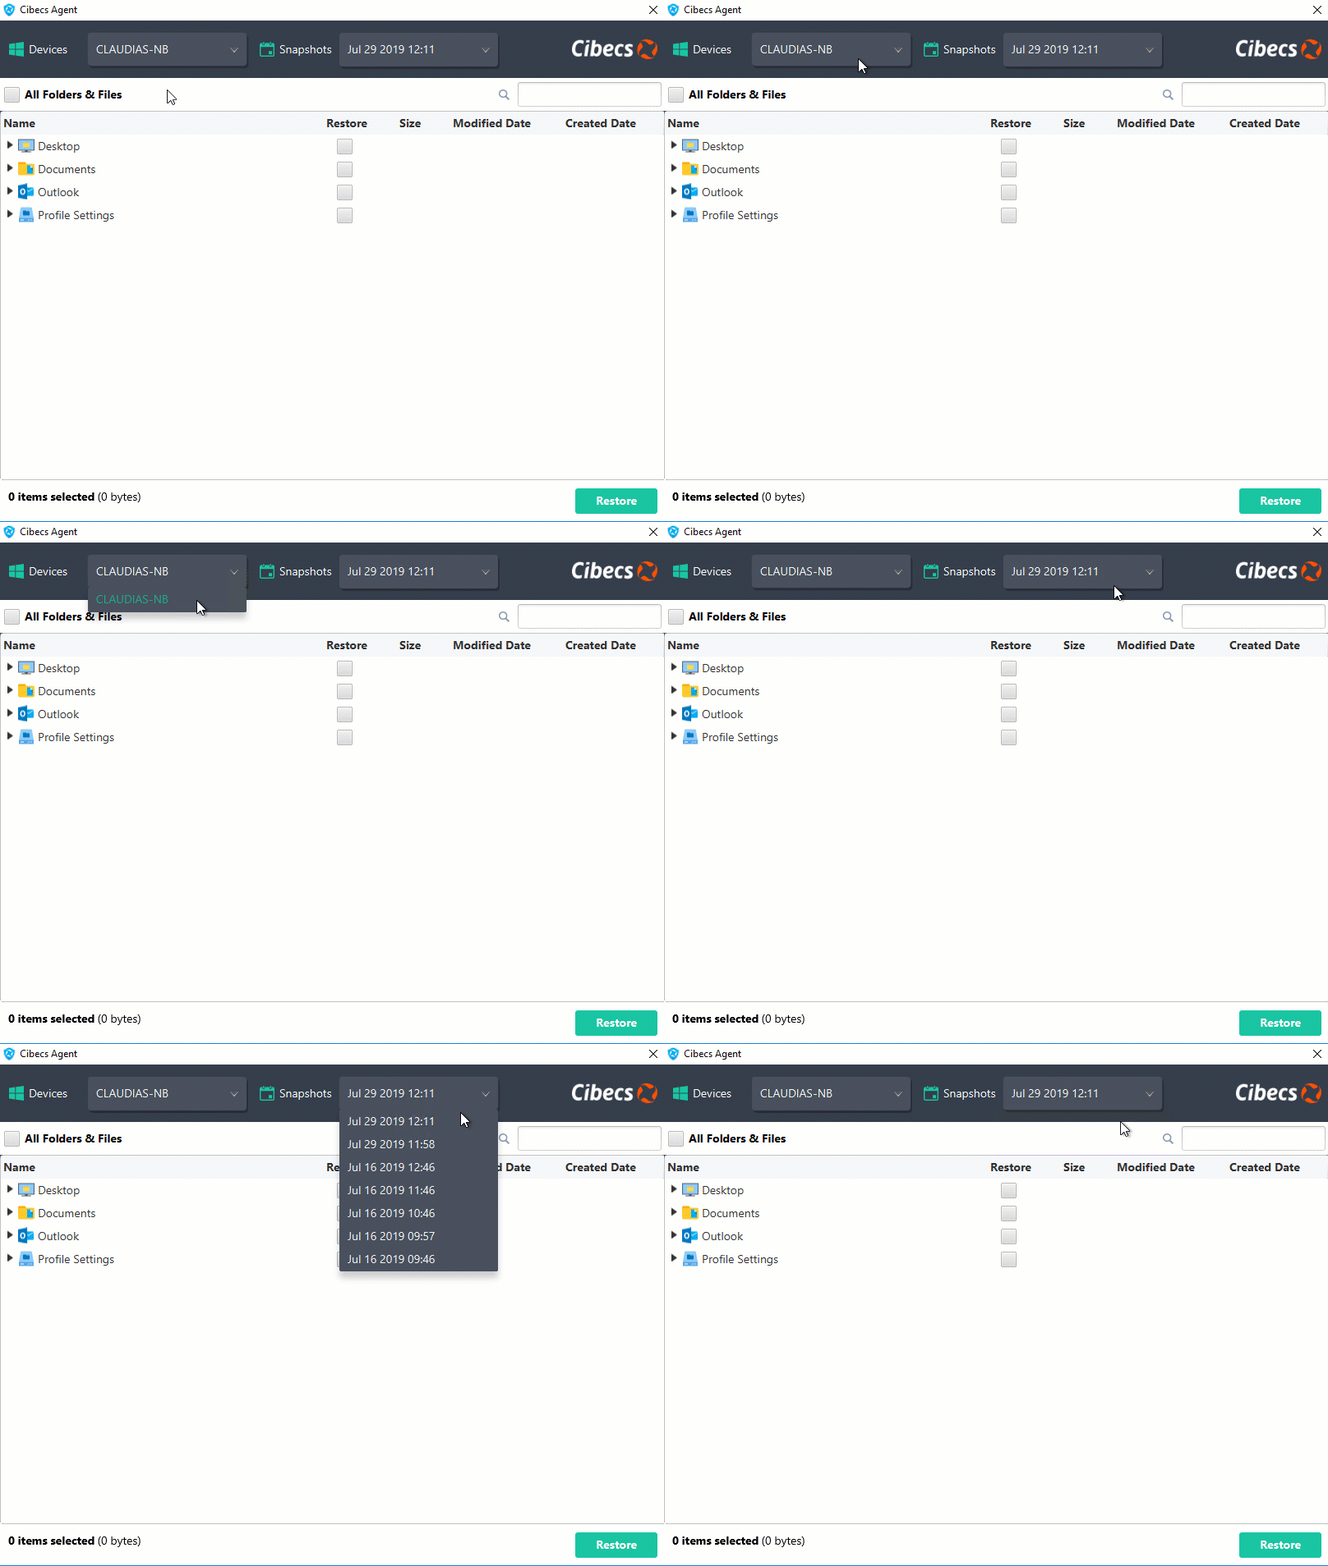
- At the top of the Cibecs Agent, choose the device and then the snapshot that you want to migrate to the new device. The snapshot is a record of a device's data at a specific point in time and you can choose from any of the times shown in the list.
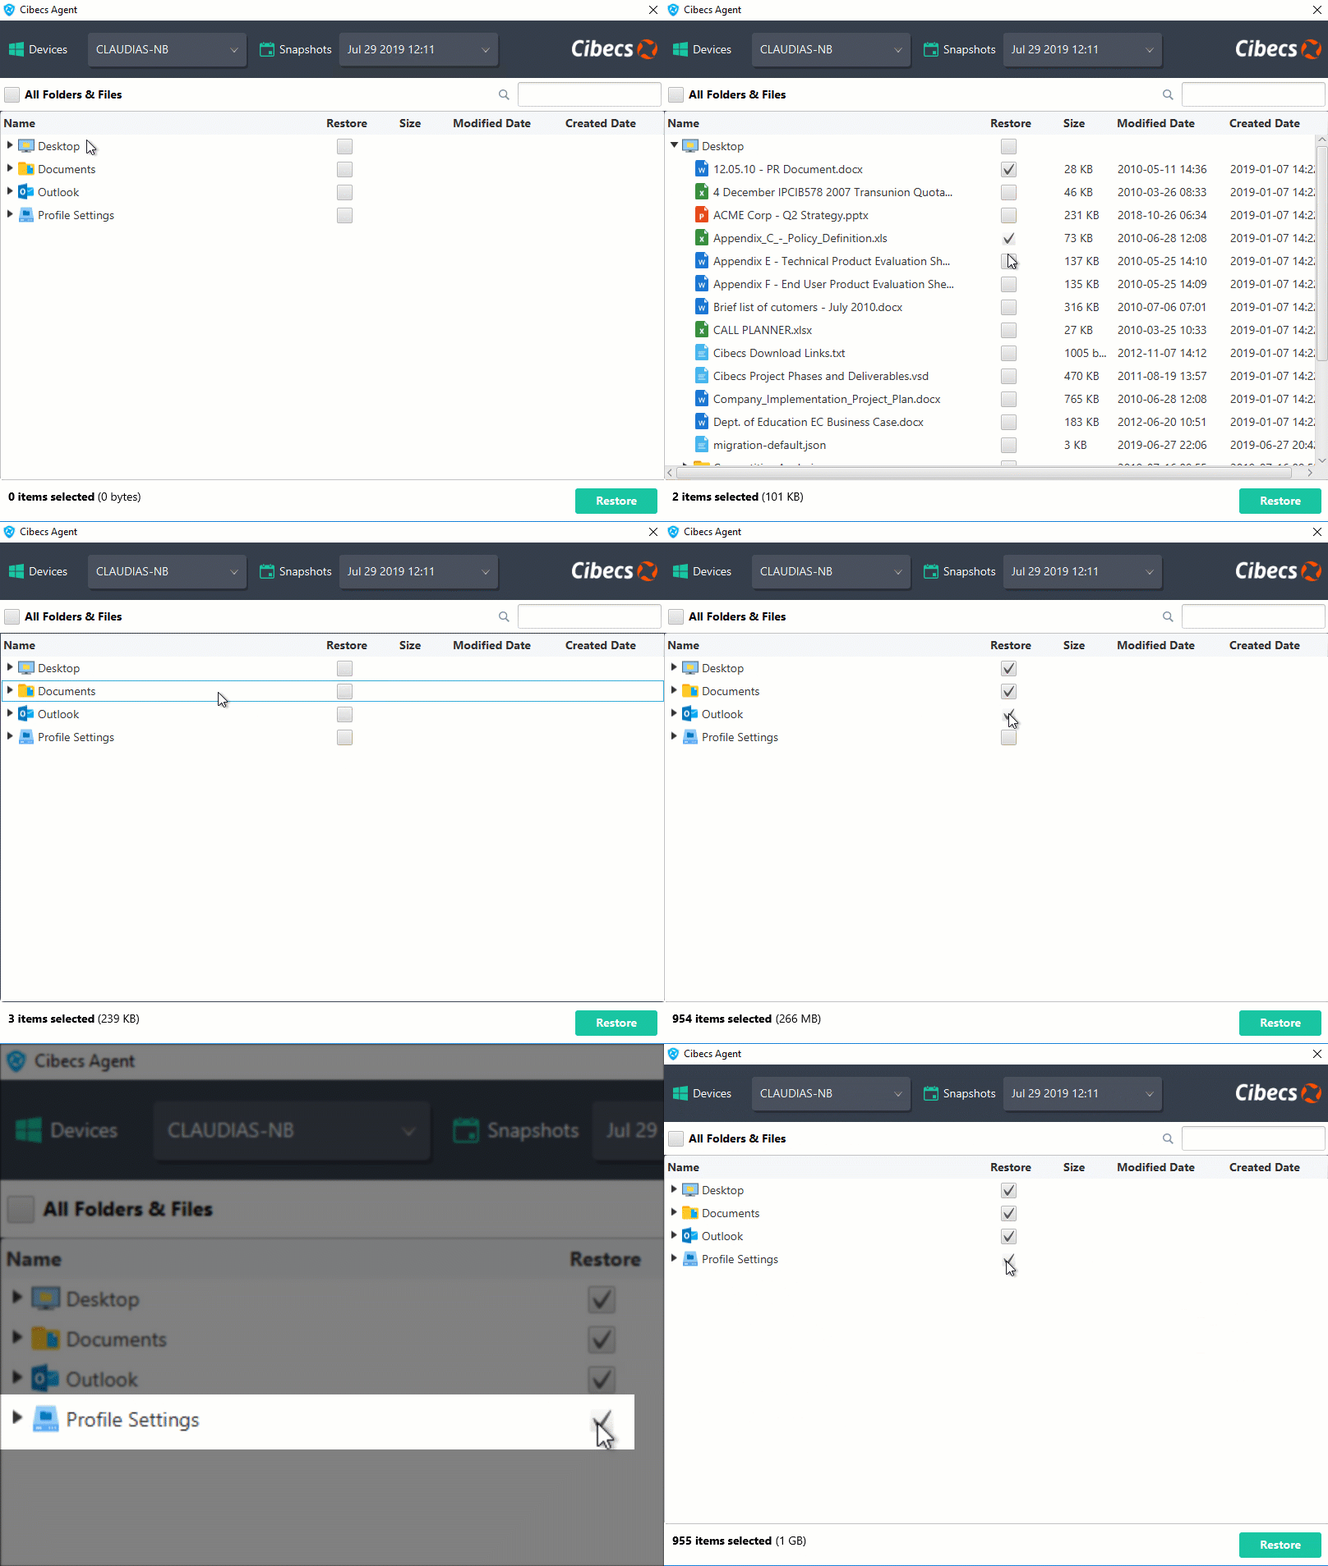
- Choose which files you want to restore. You can choose All Folders & Files, all Desktop files, all Documents, or all files on the volumes (drives). Alternatively, you can select individual files.
- Select Restore.
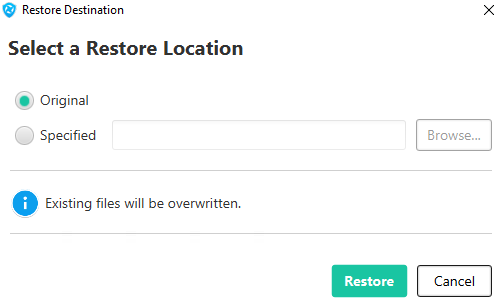
- Choose the location for the migrated files. If you choose Original, the files will be loaded to the same location that they had on the old device. Or you can choose a different Specified location if you prefer.
- Select Restore.
The selected user data and profile information is downloaded from Endpoint Cloud to your new device. If you have chosen desktop files, you will see them appear on the desktop.
